speedy swallowtail shawl
 It’s been hard, but I’m trying to rely less on knitting patterns. Browsing blogs and ravelry and knitting magazines, I am always finding pattern after beautiful pattern that I would like to knit. It's much easier to follow a pattern without thinking, than it is to try to design something on my own..
But I'm trying to challenge myself to design my own patterns. To do the tedious swatching, the fussy calculations and force myself to learn the basic architecture of different garments instead of relying upon printed instruction. My hope is that it can move my knitting more away from the realm of passive consumption (more patterns, more books, more yarn) to the realm of active engagement and creation.*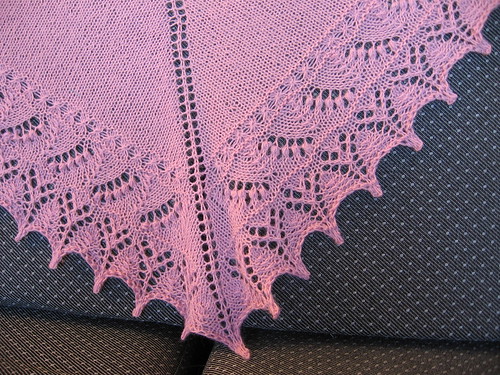 So here’s my first design-- though to be honest, it’s really just a pattern alteration. More photos can be found on its ravelry page. My grandma has been very sick in the hospital and I needed something quick to knit up to give to her as a gift. Taking inspiration from Ysolda’s Ishbel, and the Wool Peddler’s shawl, I kept the majority of this shawl plain, but added in the border and edging from the Swallowtail Shawl, a row of gathered stitches (inspired by the Miranda Triangle Shawl from Knitted Lace of Estonia) and some garter rows for distinguishing the different patterns. I thought this would take me atleast a month but I finished in about 10 days! Thanks to season 1 of Star Trek and my need for distraction from my ongoing crisis about what to do with my life.
The pattern instructions are below. In order to follow them, you also need to download the Swallowtail Shawl pattern from Evelyn Clark's website.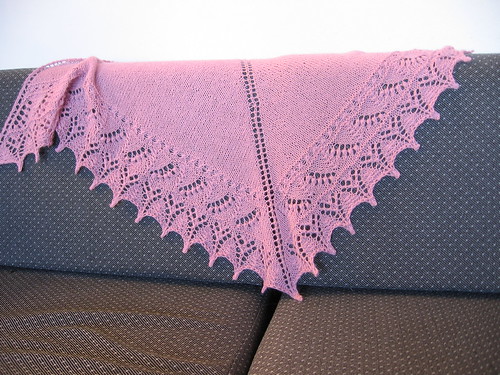 Gathered stitches (worked over 3 stitches)
K3tog but do not slip these stitches from the left needle, yo, then knit the same 3 stitches together again, then slip all 3 stitches from left needle. (From Knitted Lace of Estonia)
Follow Swallowtail instructions up until the end of row 6. Be sure to place marker where indicated on the chart.
Starting row 7:
On all RS rows: Knit 2, YO, Knit until Marker, YO, slip marker, Knit 1 (center stitch), YO, knit until last 2 stitches, YO, Knit 2.
On all WS rows: Knit 2, Purl until last two stitches, knit 2
Knit until you reach 207 stitches, ending on a RS row (207 stitches - 1 middle stitch + 103 stitches on each side)
Next WS row: knit 2, purl 1, knit until 2 before the marker, purl 1, purl 1 (center stitch), Slip marker, purl 1, knit until 3 from the end, purl 1, knit 2
RS row: Knit 2, YO, Knit until Marker, YO, slip marker, Knit 1 (center stitch), YO, knit until last 2 stitches, YO, Knit 2.
WS row: Knit 2, Purl until last two stitches, knit 2 –> you should end with 211 stitches (1 middle stitch + 105 stitches on each side)
RS row: Knit 2, YO, knit 2, make gathered stitches until 2 stitches before the marker, knit 2, YO, slip marker, knit 1 (center stitch), YO, knit 2, work gathered stitches until the last 4 stitches. Knit 2, YO, knit 2. --> you should end with 215 stithces (1 middle stitch + 107 stitches on each side)
WS row: Knit 2, purl until last two stitches, knit 2.
RS row: Knit 2, YO, Knit until Marker, YO, slip marker, Knit 1 (center stitch), YO, knit until last 2 stitches, YO, Knit 2. --> 219 stitches
WS row: knit 2, purl 1, knit until 2 before the marker, purl 1, purl 1 (center stitch), Slip marker, purl 1, knit until 3 from the end, purl 1, knit 2
RS row: Knit 2, YO, Knit until Marker, YO, slip marker, Knit 1 (center stitch), YO, knit until last 2 stitches, YO, Knit 2. --> 223 stitches
WS row: Knit 2, Purl until last two stitches, knit 2
You are now ready to begin the Lily of the Valley Border 2. You should 223 stitches on your needles. The chart has you working the pattern over 219 stitches to begin with. In order to adjust for the extra four stitches in each row, knit an extra stitch in the following places in the chart:
- After the first YO
- Before the YO right before the center stitch
- After the YO right after the center stitch
- Right before the last YO
Purl these extra stitches on the wrong side row and place them in the same locations on the RS row.
The pattern will not be noticeably different.
After completing Lily of the Valley Border 2, you should have 243 stitches on your needles.
RS row: Knit 2, YO, Knit until Marker, YO, slip marker, Knit 1 (center stitch), YO, knit until last 2 stitches, YO, Knit 2. --> 247 stitches
WS row: knit 2, purl 1, knit until 2 before the marker, purl 1, purl 1 (center stitch), Slip marker, purl 1, knit until 3 from the end, purl 1, knit 2
Now you are ready to begin the Peaked Edging chart. You will have 247 stitches on your needles instead of 239 as called for in the pattern. In order to adjust for the 8 extra stitches, make the following adjustments. It helps to mark it on your chart—it will make it a lot more easy to understand.
All WS rows: just purl the extra stitches.
For rows, 1, 3, 5, 7 and 9 of the chart, knit 2 extra stitches:
- After the first YO
- Before the YO right before the center stitch
- After the YO right after the center stitch
- Right before the last YO
From rows 11, 13, 15, work additional stitches as following:
- Knit one extra stitch after the first YO
- Knit one extra stitch after the first sk2p
- Knit one extra stitch before the sk2p right before the center stitch
- Knit one extra stitch before the YO right before the center stitch
- Knit one extra stitch after the YO right after the center stitch
- Knit one extra stitch after the sk2p right after the center stitch
- Knit one extra stitch before the last sk2p of the row
- Knit one extra stitch before the last YO of the row.
This adjustment will make the peaked edging slightly wider on the side and center peaks, but is not very noticeable.
For the RS row before the bind off,
K2, yo, k9, yo, k1, *yo, k7, yo, k1; repeat from * until 11 stitches remain, yo, k9, yo, k2.
Bind off as indicated in the pattern.
*This is not to say that I won’t knit any commercial patterns at all—in fact, there is still a lot I need to learn from them and I will probably still rely heavily on them—but I need to delve into them deeper and understand them better. What exactly distinguishes the different cast-on techniques? How does a short row work? How does this pattern writer construct a sweater? What are alternate ways to do it?
** Speaking of exercises in futility, Yarn Harlots’ multiple attempts at casting on the 600+ stitches for the Miranda Triangle Shawl can only make me cringe. I would have given up after try #2. I still have not had the heart to unravel my rasta fari hat.
5 comments:
what an adventure! looks like you created a pattern i'd like to try. *smacks own wrist* finish what is started first! ;)
hahah :) I'm the same way! The moment I start knitting something... I'm already lusting after other patterns....
Knitting appears to be quite a Philadelphia-appropriate activity - what with all of the YO.
ULTIMATE BRUTALITY!
Wow - Thanks for posting such a detailed description of your ideas. I was thinking of doing something similar! Looks great.
Post a Comment